
Table of Contents
- What You’ll Need Before Your First Pumping Session
- How to Use a Breast Pump for the First Time
- How to Start Pumping While Breastfeeding
- How Often to Pump Breast Milk
- Pumping Technique: Let-Down, Massage, and Session Length
- Why a Hands-Free Breast Pump Changes the Routine
- Cleaning, Storing, and Troubleshooting Your Pumping Setup
- Frequently Asked Questions
Last Updated: October 21, 2026
What You’ll Need Before Your First Pumping Session
Learning how to pump milk for beginners starts with one simple truth: learning to pump milk is only half the job. This guide from General Home Medical Supply walks you through each step, and we’ll also show you how to get a hands-free pump covered through Tricare without chasing paperwork yourself.
Before you sit down for that first session, gather these items:
- A double electric pump or hands-free pump
- Flanges in two sizes (your size can change)
- Clean collection bottles or bags
Pumping is the process of removing breast milk from the breast using a pump, either to store it for later or to relieve fullness. It is a skill, not an instinct. Most beginners need two or three tries before it feels natural.
Choosing a Pump and Checking Your Flange Size
Pick a pump that fits your routine. A double electric pump saves time because it drains both breasts at once.
Flange size matters more than most guides admit. The flange is the funnel-shaped cup that sits over your nipple.
How to measure at home:
- Measure the diameter of your nipple at its base, not the areola, using a ruler or a printable sizing guide from your pump maker.
- Measure both nipples; they are often different sizes.
- Match your measurement to the flange size chart for your specific pump brand, since sizing varies between manufacturers.
- Recheck after the first week and again around week three, because nipple size often shifts in early postpartum.
Signs your flange is too small:
- The nipple rubs against the tunnel walls
- You feel pinching or see redness or a white ring after a session
- Milk leaks around the edges
Signs your flange is too large:
- More than a small amount of areola pulls into the tunnel
- The nipple moves freely with lots of empty space around it
- Suction feels weak or inconsistent
A correct fit looks like this: the nipple sits centered in the tunnel, moves freely without rubbing, and only a small amount of areola is drawn in.
Order two flange sizes with your pump instead of one. Swapping sizes later usually means waiting on a shipment, and a wrong fit in week one is the fastest way to hate pumping. If you are working with us on a Tricare hands-free pump, mention your flange size when you request your pump so we can coordinate the right fit from the start.
If you cannot find a comfortable fit after trying two sizes, or if pumping causes ongoing pain, a lactation consultant can measure you in person and recommend a specific flange or insert. That visit is often the fastest fix for a beginner who is ready to give up.
How to Use a Breast Pump for the First Time
Start clean, start low, and start calm. That is the whole method.
Wash your hands. Assemble the pump parts and check that every seal sits flush. A loose valve or a missing membrane kills suction and leaves you wondering why nothing is coming out.
Assembling Parts and Centering the Nipple
Center the nipple in the middle of the flange tunnel. Not pressed to one side. If it touches the wall, the seal breaks and suction drops.
Here is the sequence we recommend:
- Attach the flange to the bottle or collection kit.
- Press the flange against your breast so the nipple sits centered.
- Turn the pump on at the lowest setting.
- Adjust until you feel a gentle pull, never pain.
Starting on Low Suction and Building Up
Begin on low suction. This is not a warm-up ritual; it protects tissue and helps your let-down reflex trigger. Let-down is the release of milk that happens when the breast responds to suckling or pumping.
Once milk starts flowing, raise the suction one level at a time. Stop at the highest setting that still feels comfortable. Higher suction does not equal more milk, and pushing past comfort is the most common beginner mistake we see.
Cranking suction to the max to “get more” usually backfires. It can damage nipple tissue, and damaged tissue produces less milk, not more.
How to Start Pumping While Breastfeeding
Add pumping slowly, and let your baby lead the schedule. If you are exclusively breastfeeding, pump after a morning feed when supply tends to be highest.
If you are returning to work, start two to three weeks before your first day back.
A workable early plan:
- Week 1: one pump session per day, after the morning feed
- Week 2: add a second session, mid-afternoon
- Week 3: mirror your work schedule on days off
Keep breastfeeding directly whenever you can. Pumping is a supplement to feeding, not a replacement, unless your care team advises otherwise.
How Often to Pump Breast Milk
Most people who pump to maintain supply pump every three hours during the day, and once at night if their baby is still feeding overnight.
Check Your Insurance Coverage →
How often to pump breast milk depends on your goal, not a fixed rule. Match frequency to what you are trying to do.
| Your Goal | Sessions Per Day | Typical Timing |
|---|---|---|
| Build a small stash | 1-2 | After morning feed |
| Return to work | 3-4 | Every 3 hours on shift |
| Maintain supply while baby is in care | 6-8 | Every 3 hours, day and night |
| Relieve engorgement | As needed | Until comfortable |
Output volume varies widely between people and between sessions. A session that yields less than the last one is normal and not a sign of failing supply.
Frequency drives supply more than suction strength. If your output is dropping, add a session before you add suction.
Pumping Technique: Let-Down, Massage, and Session Length
A typical pumping session lasts 15 to 20 minutes per breast, or about 20 to 30 minutes for a double pump.
Technique that helps:
- Use breast massage before you start, working from the outer breast toward the nipple
- Apply gentle breast compression during the session when flow slows
- Watch your baby, or look at a photo, to help trigger let-down
- Relax your shoulders and breathe slowly
If let-down is slow, try a warm compress for a minute or two first. Some pumps have a stimulation mode that mimics a fast suckling pattern; use it for the first two minutes.
Pain is not part of good technique. If pumping hurts, stop and check your flange fit and suction level before continuing.
Why a Hands-Free Breast Pump Changes the Routine
A hands-free breast pump is a wearable pump that sits inside a bra and collects milk without you holding anything. A hands-free pump lets you handle a bottle, answer an email, or tend to an older child during a session.
That flexibility is the difference between pumping four times a day and pumping once. Sessions you can fit into real life are sessions you actually keep.
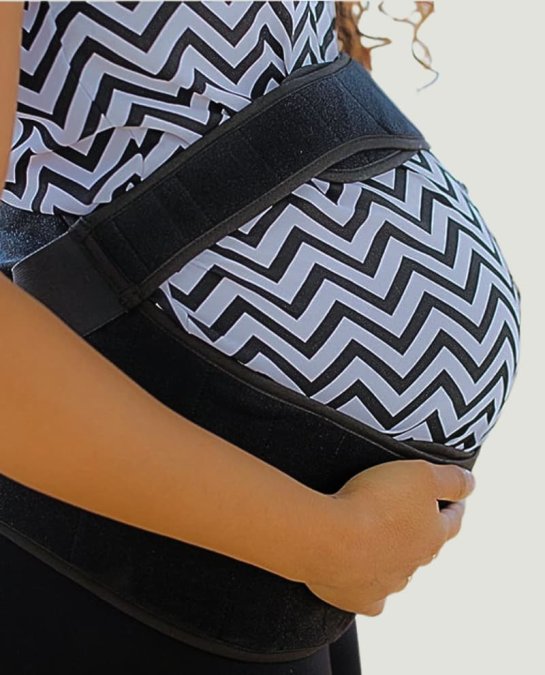
General Home Medical Supply works with Tricare members on exactly this. We handle the prescription coordination and insurance authorization for you, then ship your breast pump and maternity back support to your home at no charge, with free shipping.
If your back is also hurting postpartum, ask about a maternity back support in the same request. Getting both items authorized together saves a second round of paperwork.
Cleaning, Storing, and Troubleshooting Your Pumping Setup
Clean pump parts after every session if your baby is under three months old, was born early, or has a weakened immune system.
If your baby is older and healthy, a common routine is to wash after every session and sanitize once a day, or to refrigerate parts between sessions for up to 24 hours and wash once daily.
Safe milk storage at a glance:
| Location | How Long | Notes |
|---|---|---|
| Room temperature | Up to 4 hours | Keep away from direct sun and heat |
| Insulated cooler with ice packs | Up to 24 hours | Good for workdays and travel |
| Refrigerator | Up to 4 days | Store in the back, not the door |
| Freezer compartment inside a fridge | Up to 2 weeks | Check your unit’s temperature |
| Freezer with a separate door | Up to 3 to 6 months | Best for building a stash |
| Deep freezer | Up to 12 months | Label clearly with the date |
These ranges reflect widely used public health guidance; always follow your pump maker’s and pediatrician’s instructions if they differ.
Labeling and rotation:
- Write the date and time on every bottle or bag before you fill it.
- Use the oldest milk first, the same way you would rotate food in a pantry.
- Fill bags to the marked line, not to the top, because milk expands when frozen.
- Store milk in 2 to 4 ounce portions so you thaw only what you need and waste less.
Thawing and warming:
- Thaw frozen milk in the refrigerator overnight, or hold the bag under warm running water.
- Never microwave breast milk; it heats unevenly and can scald your baby.
- Swirl gently to mix separated fat back in; do not shake hard.
- Use thawed milk within 24 hours if it was thawed in the refrigerator, and do not refreeze it.
Transporting milk:
- Pack milk in an insulated bag with ice packs for commutes and travel.
- Keep milk cold until you reach a refrigerator or freezer.
- If you are flying, breast milk is generally treated as medically necessary and can be carried in quantities beyond standard liquid limits; check current screening guidance before you travel.
Common problems and fixes:
- Low output: check flange size, add a session, try breast massage and compression, and review hydration and stress.
- Pain: reduce suction, resize the flange, check for a bleb or clog, and take a break on that side if tissue is damaged.
- No suction: inspect valves and membranes for tears, check that every seal sits flush, and replace worn parts.
- Nipple damage: pause pumping on that side, keep the area clean and dry, and speak with a lactation consultant.
A simple routine beats a perfect one. Wash after every session, label every container, and keep a cooler bag packed for workdays. If you are a Tricare member, we handle the insurance authorization for your hands-free pump and maternity back support and ship both to your home at no charge, with free shipping, so your setup is ready before your first session.
Frequently Asked Questions
How do I use a breast pump for the first time?
Wash your hands and assemble clean pump parts. Center your nipple in the flange without letting it rub the sides, then start on the lowest suction setting and increase gradually until it feels comfortable, not painful. Pump for about 15 to 20 minutes per session. If you are covered under Tricare and need a hands-free breast pump, General Home Medical Supply handles the prescription and insurance authorization and ships the pump to your home at no charge, with free shipping.
How often should a beginner pump?
If you are pumping to build supply or replace a feed, aim for roughly every three hours during the day, which works out to about eight sessions in 24 hours. If you are pumping once in addition to breastfeeding, a morning session after the first feed usually yields the most milk. Track output for a week before changing your routine, and talk to a lactation consultant if your supply concerns you.
How long should I pump each session?
Most beginners pump for 15 to 20 minutes per session, or until milk flow slows to drips. Double pumping both breasts at once often finishes faster than single pumping. If you are still getting steady flow at 20 minutes, continue a few more minutes. Stop sooner if you feel pain or rubbing, and check your flange fit before the next session.
How do I store breast milk after pumping?
Put expressed milk in clean, labeled bottles or storage bags with the date and time. Refrigerate promptly and follow current CDC guidance for refrigeration and freezing timeframes, since those recommendations are updated periodically. Thaw frozen milk in the refrigerator or under warm running water, never in a microwave, and use thawed milk within the timeframe the CDC specifies. When in doubt, check the CDC website directly.
Pumping gets easier with the right fit, a realistic schedule, and gear that fits your day. If you have Tricare and need a hands-free breast pump, General Home Medical Supply handles the prescription and insurance authorization, then ships your pump and maternity back support to your home at no charge with free shipping. Check your insurance coverage with us and get your setup sorted before your due date.